December 3, 2018
Precise satellite positioning to the nearest micron

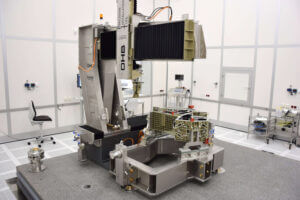
The IOU-PIT mounting tool developed and constructed by Airworks with HEIDENHAIN LIP 581 linear encoders is located at OHB Systems in Europe’s largest ISO 5 cleanroom on a granite plate weighing several tons.
Highly compact mounting thanks to linear encoders from HEIDENHAIN
OHB Systems AG is constructing a new hyperspectral satellite called EnMAP for terrestrial monitoring. Five mirrors, six prisms and three cameras as well as electronic components are being mounted in an exceedingly compact space—with frequently only fractions of a millimeter between the components. Any contact between these parts must be completely excluded during the mounting process because this would destroy the sensitive components. HEIDENHAIN LIP 581 linear encoders and the POSITIP 880 digital readout provide help.
As expressed so appropriately at the start of the Star Trek movies: “Space, the final frontier.” Gavin Staton, a Project Manager in OHB in the EnMAP satellite program and Dave Mussett, a responsible engineer, certainly desire the vast distances of space for their project, but “even though outer space offers infinite expanses we can’t unfortunately use these when constructing satellites. Instead of that our task is to minimize room and weight.” Consequently, each cubic millimeter of installation space has to be intelligently utilized because the satellite must have the lowest possible mass and highly compact dimensions for its journey through space and along its terrestrial orbit. The fact that the construction must also be extremely stable does not make the project any easier, as demonstrated by the labyrinthine inner workings of the EnMAP satellite.
Rods, braces, and knockouts—the challenges during assembly

The required accuracy and utilization in a cleanroom were decisive aspects for the high level of complexity during construction of the IOU-PIT and the use of HEIDENHAIN encoders.
OHB Systems is constructing the EnMAP satellite at its Wessling location to the west of Munich, Germany. Most drivers on the A96 highway rushing past the front of the unobtrusive office complex have no idea of the extent of high tech it contains. The outside of the building certainly offers no hint that it contains Europe’s largest ISO 5 cleanroom in which the EnMAP satellite is being assembled. Put more precisely, though, not the entire satellite is being assembled here, but initially only the unit accommodating the optical instruments that form the core of the project.
This core is located in its own housing, the chassis of which was milled from one solid aluminum block. The base, external walls, and internal struts form an extremely robust unit within which all other parts of the complex optoelectronics are fitted and wired. Even mounting the first component to be installed is a high-precision task although the work space is still empty, because accessing this space is possible from only one side. The highly angular arrangement of the struts also significantly limits the freedom of movement.
Room in the work space becomes increasingly compact with each additional component until the flexibility of movement is finally reduced to just a few hundredths of a millimeter. Despite this the optical components—the mirrors, prisms, and cameras—must never knock against either each other, the housing, or the tool, due to their extremely sensitive surfaces. Even the slightest scratch would influence the optical system so much that the results would be rendered unusable. “The incident light would no longer be correctly diffracted, would not be correctly focused, and would no longer be correctly guided to the cameras via the mirrors. This means the cameras would no longer receive the complete luminous intensity and light spectrum, and in the worst case no light at all would reach the cameras. These would then supply distorted or unusable images or no images at all—rendering the complete EnMAP mission a failure,” explained Gavin Staton with regard to the critical importance of error-free mounting of the optical units.
The mounting tool for micron-precise assembly

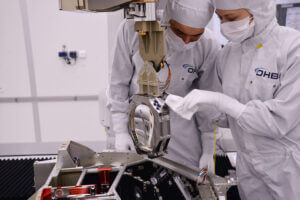
Absolute cleanness and a very fine touch were needed for mounting a lens in the satellite.
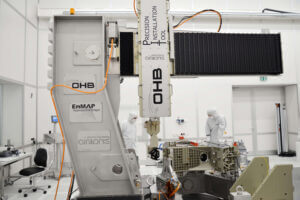
The OHB engineers receive support during the mounting process from a special mounting tool called IOU-PIT (Instrument Optics Unit-Precision Installation Tool) from the Italian company Airworks. Those seeing this powerful unit in the cleanroom for the first time are reminded more of a crane for heavy loads than a mounting tool for the highly accurate positioning of very compact and lightweight components weighing no more than 20 kg. The IOU-PIT is a formidable apparatus with dimensions of 3040 mm x 2510 mm x 2300 mm and a weight of 2.5 tons. This constructive complexity results from the special demands placed on the IOU-PIT, namely the required precision during mounting and utilization in the cleanroom. This on the one hand requires extremely high levels of mechanical rigidity, and on the other the avoidance of several materials not permitted in the cleanroom.
Airworks engineers in the Italian town of Monfalcone developed and constructed the IOU-PIT. Airworks is an independent development office for sophisticated high-tech projects including aerospace, and Stefano Picinich has responsibility for the IOU-PIT. “Actually, for the IOU-PIT main mechanisms, we discussed the design with several high-end suppliers of positioning systems. Unfortunately, the project requirements were so challenging that their interest in the contract rapidly cooled down. At the end of the day, we couldn’t find a partner who had the courage to transform our construction into a real tool,” reminisced Picinich with a wry smile about the development phase. “So we carried out the construction ourselves and luckily found a partner for the measuring technology with HEIDENHAIN who, like us, did not recoil from the targeted accuracies.”
HEIDENHAIN linear encoders and digital readouts—knowing the precise position of the tool tip

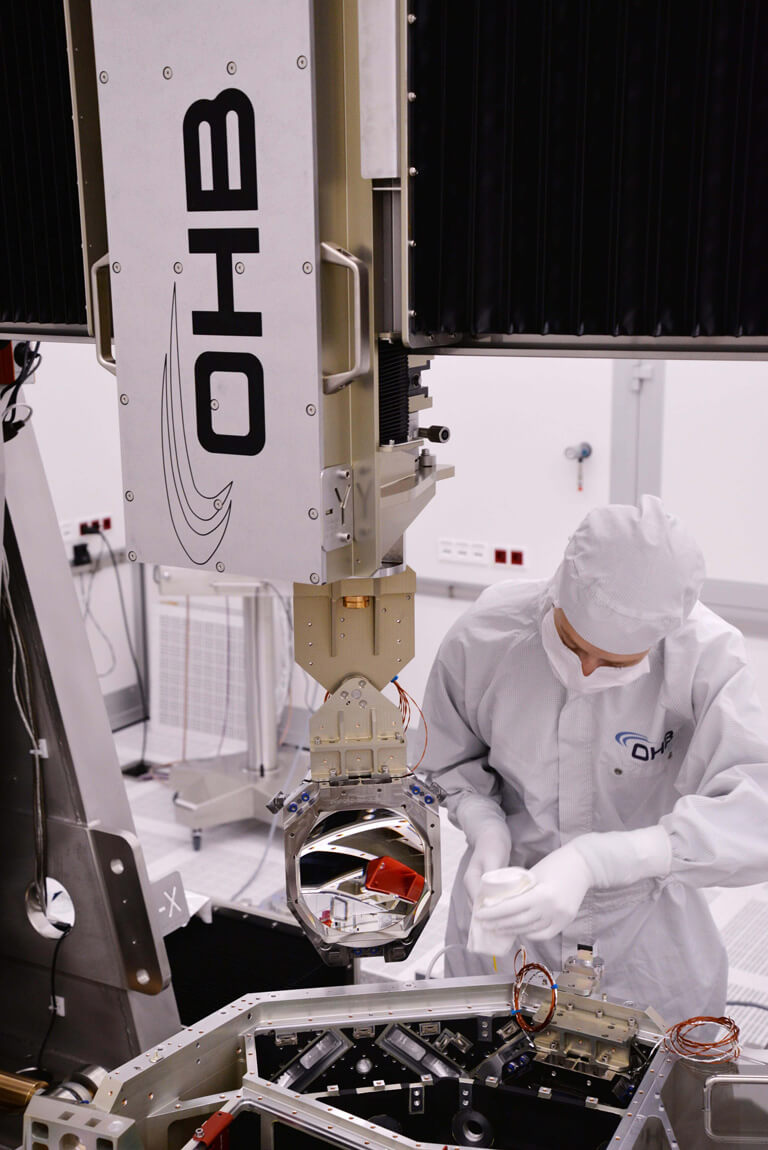
The view from above reveals the tight working space in the satellite housing and how precisely the mounting tool has to position.
Exposed incremental HEIDENHAIN LIP 581 linear encoders calculate position data with the required high resolution on each axis of the IOU-PIT. They supply measured position values with a baseline error of less than 0.175 µm over 5 mm intervals and with an interpolation error of just ±12 nm. A HEIDENHAIN POSITIP 880 digital readout then displays the values.
The IOU-PIT moves the components for the EnMAP satellites in two phases: The three principal axes with drives enable motor-driven pre-positioning of the components, whereby speed of motion is of no consequence. Two optional traverse speeds are available: 1 mm/s and 0.1 mm/s, or put metaphorically, at snail’s pace and one tenth of a snail’s pace. Maximum traverse paths of the IOU-PIT consist of a respectable 1250 mm × 1125 mm × 650 mm, where the maximum position deviation across a range of 500 mm is a mere 50 µm.
The very last millimeters and micrometers to the mounting location, and therefore also the movements in the compact working space of the satellite, are carried out entirely manually by the OHB technicians with help from the mounting tool. They move the components to be mounted micron by micron through the labyrinth of struts, already installed components, and cables to their final positions. “During the process we keep a very close eye on the part to be mounted as well as the digital readout unit,” said Dave Mussett about the filigree manual operation. “As a result we have double safety—firstly thanks to our visual inspection on the object itself and secondly due to the extremely accurate position indications on the easy-to-read POSITIP 880 display.” The mounting process confirms daily that OHB Systems placed its trust in the right technology in the form of the IOU-PIT mounting tool from Airworks. Until now all components have reached their correct locations in an undamaged state—also thanks to HEIDENHAIN’s encoders and digital readout.
The EnMAP mission
EnMAP (Environmental Mapping and Analysis Programme) is a German hyperspectral satellite mission for terrestrial monitoring. Imaging spectrometers measure the solar radiation reflected from the earth’s surface ranging from visible light to shortwave infrared, in turn enabling precise statements to be derived about the condition of the surface of the earth and its changes. In this way current developments concerning environment, agriculture, land utilization, water management, and geology can be responded to at a global level.
The EnMAP satellite has imaging spectrometers able to map the earth’s surface in continuous spectra of 250 narrow bands. This enables quantitative and diagnostic information to be gained about vegetation, land use, rock surfaces, and bodies of water. The data provide information about the mineralogical composition of rocks, damage to plant life from air pollutants, and the level of soil pollution.
The satellite is designed to record data with a ground resolution of 30 x 30 meters from an orbit height of approximately 650 kilometers. The possibility to incline the satellite by up to ±30 degrees perpendicularly to the flight direction allows comparative observations of the same location over four days, and for this reason EnMAP is highly suitable for documenting spatial-temporal modifications such as erosion sequences or periods of vegetation. Spectroscopic terrestrial observation supplies information about how the ecological systems of many different natural environments are created and spread—ranging from coastal zones and cultural landscapes influenced by people to steppes, deserts, and forest regions.
Responsibility for scientific direction of the EnMAP mission lies with the German GeoForschungsZentrum (GFZ) in Potsdam, and DLR Space Agency conducts overall project management. OHB Systems AG is prime contractor for the entire mission, developing specifically the hyperspectral sensor satellite, both the instrument and the spacecraft bus. The DLR in Oberpfaffenhofen, Germany, is responsible for establishing and setting up the ground infrastructure. Satellite operation and data reception are handled by the German Space Operations Center (GSOC) together with the German Remote Sensing Data Center (DFD) and the Remote Sensing Technology Institute (IMF).
Work completed for OHB Systems AG, prime contractor for EnMAP who is under contract to DLR with funding from the German Ministry for Economic Affairs and Energy (Bundesministerium für Wirtschaft und Energie) under reference number 50 EP 0801.

